11 min read
Short answer: Set one-inch margins, Calibri or Arial at 11 points, single-column body text, and empty Word headers and footers. US ATS portals read export order, not your design tab. When contact info sits in a header or Experience lives inside a hidden table, Workday and Greenhouse import the wrong lines first. Fix those Microsoft Word resume settings for US ATS success before you touch keywords.
You've probably polished bullet wording while margins stayed at 0.5 inch and a sidebar table still split dates from employers. That's not the same as a recruiter seeing your current title on row one. You're fixing export order here, not decoration. Check your resume for free on the same DOCX you'll upload, but only after a Notepad paste shows employers top to bottom. I've screened stacks of these in Workday and Greenhouse, and the file that wins is boring on Page Layout and specific in Experience.
Below: why Word settings beat template shopping, margin and font defaults that survive export, header and table traps, exceptions when PDF is required, and what you'll change in the next twenty minutes. Job searching's already draining. You don't need another Canva export that still hides a two-column grid.
And when the portal asks for a cover letter after upload, don't paste lines pulled from a header zone the parser skipped. Generate a cover letter from the corrected body text so the note matches the employer order you fixed in Word.
Quick Wins
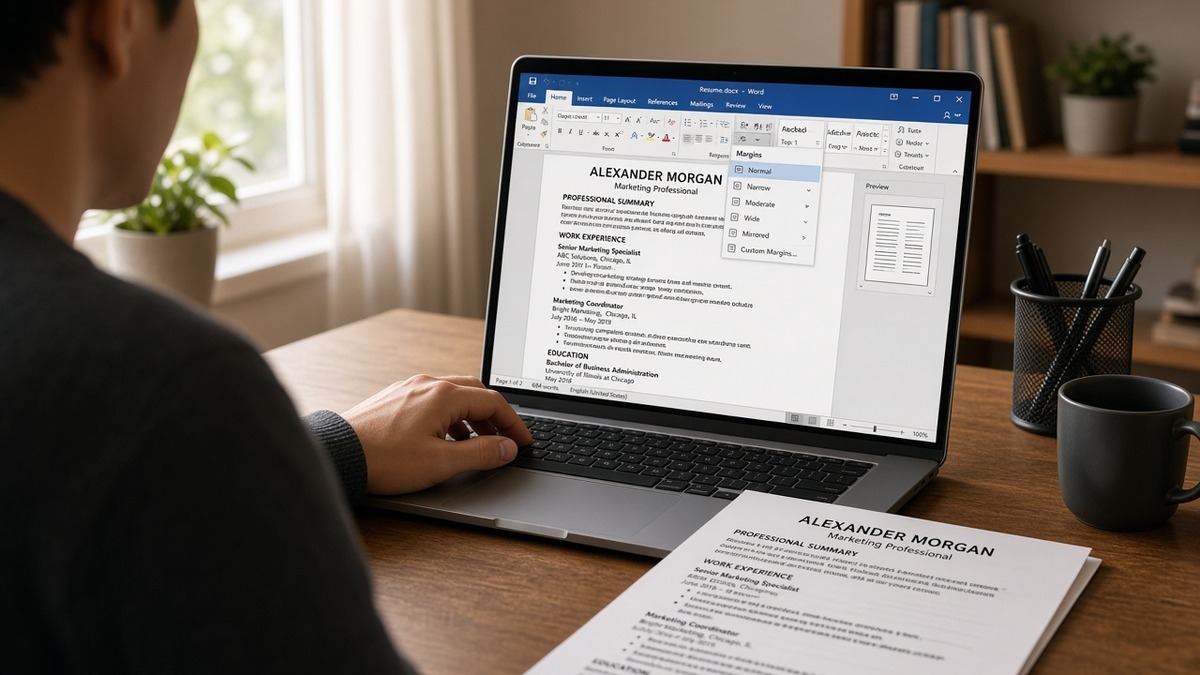
- Page Layout → Margins → Normal (1 inch all sides).
- Home → Calibri 11 pt on the entire body; clear manual font overrides.
- Insert → Header & Footer → Remove header; move phone and email into line two of the body.
- View → Gridlines on; delete layout tables; paste full text into Notepad once.
Why Microsoft Word resume settings for US ATS success start with margins, not keywords
US employers store applications in Workday, Greenhouse, Lever, iCIMS, and Taleo. Each system pulls text from your upload into searchable fields. Word's Page Layout choices change that character stream more than font color ever will. Narrow margins push lines into wrapping patterns parsers read as separate jobs. Headers inject phone numbers before your name reaches the body stream.
The bar your file must clear: plain-text paste reads name and contact first, then Experience with Month Year dates attached to each employer line, then Education, then Skills. Margins, font, and column structure either preserve that order or scramble it before a recruiter opens anything.
A composite operations analyst whose template uses 0.5 inch margins and a two-column table can look balanced on screen while Notepad shows every date stacked above every company name. Same person, same jobs. Different field view because Word settings fed the parser cells out of reading order.
Keyword density cannot fix a file where Skills parsed as the first employer block. Settings first. Tailoring second. That order saves evenings.
Read why your resume parses wrong for the Notepad diagnostic. This page is the Word ribbon paths that stop the scramble at the source.
Edge case: you're on a one-page file and tempted to shrink margins to 0.4 inch to avoid a second page. Portal previews sometimes clip the last bullet instead of wrapping cleanly. Keep one inch and trim a line of summary prose instead.
Edge case: the posting asks for Times New Roman. Switch the body font, keep the same margins and single column, and paste test again. Parser order should stay stable even when the face changes.
Word settings recruiters notice before bullet wording
Work through margins, fonts, headers, and tables in that order. Re-export and paste into Notepad after each block. Stop when employer lines read top to bottom without gaps.
Margins and page size
Open Page Layout → Margins → Normal. Confirm Top, Bottom, Left, and Right each show 1 inch. US Letter size, portrait orientation. Avoid Narrow or Moderate presets unless you're fighting a genuine overflow and you've paste-tested the result.
Before: 0.5 inch margins on a Canva-imported template; employer lines wrap so dates sit alone on the previous line in Notepad.
After: 1 inch margins; each role fits as Employer | Title | Jan 2022 to Present on one line before bullets.
Set paragraph spacing to 0 pt before and 6 pt after in Paragraph settings. Line spacing 1.15 keeps bullets readable without inserting blank rows parsers read as employment gaps.
Font and bullet styles
Select all body text. Home → Calibri → 11 pt. Clear manual formatting with Ctrl+Space if styles fought you. Apply List Bullet for round bullets; avoid wingdings and custom icons.
Before: Name in 18 pt Georgia, body in 10 pt Arial, skills in 9 pt gray text boxes.
After: Name in 14 pt bold Calibri on line one; everything else 11 pt Calibri; section labels use Heading 2 style, not manual bold alone.
Use built-in Heading 2 for Experience, Education, and Skills labels. Parsers map familiar labels more reliably than creative section names like My Journey.
Headers, footers, and page numbers
Double-click the header area. Select all → Delete. Repeat for footer. Turn off Different First Page if it repeats contact lines. Page numbers in footers often interrupt the last bullet on page one in paste output.
Before: Phone and LinkedIn URL in a header on every page; Notepad opens with digits before your name.
After: Plain lines in the body: City, ST · phone · email · linkedin.com/in/handle on line two under your name.
Tables, columns, and text boxes
Layout → View Gridlines. Click each table. If you did not type certifications into cells yourself, it is probably a layout grid. Cut text, delete the table, paste as plain paragraphs in one column.
Before: Three-column skills table above Experience; paste lists Python, SQL, Tableau, then employer names out of order.
After: Tools named inside bullets under the job that used them; optional comma-separated Skills section after Experience with no grid.
Layout → Columns → One. Remove text boxes from Insert → Shapes. Floating summary boxes parse last or vanish in Workday field view.
Before/after pair: nurse with certification table
Before: ACLS and BLS in a bordered two-column table above Experience; license number in a footer; unit type in a sidebar text box.
After: RN license and ACLS on line two under name; each hospital role lists unit type in bullet one with Month Year dates; no footer content.
Before: Med-surg, telemetry, 6:1 ratio; managed acute care patients.
After: Staff RN, Med-Surg/Telemetry, 32-bed unit, 6:1 ratio; precepted 4 orientees and maintained fall-rate below unit average in FY24 at County General.
Before/after pair: sales rep with sidebar metrics
Before: Right-column text box shows FY24 quota 118% and $2.1M closed; main column lists employers without numbers in bullets.
After: Quota and attainment inside bullet one under the current employer with Month Year dates and CRM named in the same line.
Side metrics detach from employers in parsed view. Recruiters cannot tell which role earned the number when the callout parsed first.
Copy-paste Word settings checklist
Run this sequence in order, then paste test:
Page Layout → Margins → Normal (1") · US Letter · Portrait
Home → Select All → Calibri 11 pt → Clear manual spacing overrides
Paragraph → 0 pt before · 6 pt after · Line spacing 1.15
Insert → Header & Footer → Remove header and footer on all pages
Layout → Columns → One · View Gridlines → Delete layout tables
Apply Heading 2 to Experience, Education, Skills section labels
File → Save As → DOCX working copy · Export PDF only after Notepad paste passes
Target body header after settings:
[Full Name]
[City, ST] · [Phone] · [[email protected]]
Professional Experience
[Month Year] to [Month Year or Present] · [Employer] · [Title]
[Bullet with verb, scope, tool, and outcome]
See how to add a line in Word for resume when spacing between roles still looks tight after margins are fixed.
Exceptions that still break clean Word settings
Posting requires PDF only. Fix settings in DOCX first, then Save As PDF. Run paste test on the PDF export, not only the Word file. Scanned PDFs ignore every setting here.
Academic CV converted to two pages. Keep one-inch margins and drop advisor names into Education bullets instead of multi-column publication tables. Faculty roles on US industry reqs still parse like corporate uploads.
Creative industry asks for designed PDF. Build a plain Word master for ATS portals and keep the designed file for email introductions when a human requests it. Do not upload the designed version to Workday when a plain export is accepted.
Track Changes left on. Accept all changes and turn off markup before export. Deleted text hidden in markup can reappear in paste output as duplicate employers.
Password-protected DOCX. Remove protection. Portals cannot extract text from locked files even when margins are perfect.
Assuming Mac Word matches Windows paste order. Always paste test on the machine you'll export from. Font substitution on another OS can change line wraps without changing margins.
Using Narrow margins to hide a second page. Clipped last bullets hurt more than an honest two-page single-column file with the same one-inch settings throughout.
Verify settings after Notepad paste passes
Run the free ATS checker with the job description pasted in. You're confirming employer-title pairing and whether skills landed in Experience, not chasing a perfect score on a broken layout.
Then score your job match on the same plain-text order. Keywords only help after Word settings let the parser attach them to the right job line. A high match on a header-heavy file still loses to a readable lower score.
Set Word margins and fonts tonight, then tailor
Microsoft Word resume settings for US ATS success come down to export order, not template shopping. One-inch margins, Calibri 11 pt, body contact, single column, empty headers, and no layout tables let Workday and Greenhouse read your current role before your skills rail.
Tonight: open Page Layout, reset margins, strip headers, delete gridlines, paste into Notepad, fix whatever reads out of order, then mirror posting keywords inside bullets under the correct employer. Do not submit until Experience reads top to bottom in plain text.
This won't fix applying to roles you're not qualified for. It does stop qualified candidates from losing screens because phone numbers lived in a header while Experience never reached the profile.
When you need a clean base file, build your resume in a single-column layout, then run a free ATS check before you upload again.
Read more
Frequently asked questions
Use one-inch margins on all four sides in Page Layout. Narrow margins below 0.75 inch squeeze text and can clip lines in portal previews. Wide decorative margins push contact blocks into headers where parsers skip them. After you set margins, paste the full export into Notepad. If employer lines wrap mid-word, widen margins before you tweak fonts.
Calibri or Arial at 11 or 12 points is the safe default for US corporate uploads. Times New Roman at 11 points works when the posting asks for a conservative look. Avoid script fonts, icon bullets, and mixed sizes inside one employer block. Select all body text and apply one font from the Home tab so hidden style overrides do not survive export.
No for most US ATS portals. Headers and footers often parse before body text or drop entirely on export. Put name on line one, city and phone on line two, and email on line three in the main document body. Clear the header and footer areas on every page. Re-paste into Notepad and confirm every digit of your phone appears in plain text.
Data tables you typed skills into are still risky. Invisible layout tables used to fake columns are worse. Turn on View Gridlines, delete grids you did not enter data into, and rebuild as a single column. If you must keep a small table for certifications, paste test after export. When cells reorder in Notepad, flatten to plain lines instead.
Save the working file as DOCX while you edit settings. Export PDF only after paste order is clean. Submit whichever format the posting allows, then open the portal preview when available. Text-based PDFs from Word usually match DOCX paste order when margins, fonts, and headers are already fixed. Scanned PDFs ignore every setting on this page.